beauty
How To Do Mani and Pedi At Home
Learn to take care of your hands and feet with these 8 practical tips.
- By Natura Team
If you are one of those people who go to the manicure weekly but going to the salon is still not an option, try following the steps below to learn how to master doing manicure yourself at home.
STEP 1: GATHER ESSENTIAL TOOLS
Be sure to have the following in a tote and keep the tote handy.
- Nail-polish remover and cotton swabs or pads
- Nail clippers
- Nail buffer
- Cuticle pusher and nippers
- Scrub
- Hand cream
- Basecoat
- Nail polish
- Clear topcoat
STEP 2: CUT AND SHAPE NAILS
When choosing between clippers or scissors, take comfort into account when using one or the other with your non-dominant hand. Once the accessory is chosen, cut the nails to the desired size. Then file them in the shape you prefer. If you have no problem with fragile nails, you can take the time to buff the tops and sides of your nails lightly. This will make them more uniform, which will make painting easier.
STEP 3: EXFOLIATE HANDS
With the nails cut and shaped, it is time to exfoliate your hands. You can use a specific scrub for that region or one for the body, like our Cacau Body Scrub. Applying the product is simple: with clean hands, take a small amount and, with smooth circular movements, apply to the palm and back of both hands. Once this is done, rinse and dry hands. The product serves to remove dead cells from the skin's surface, improving its appearance.
STEP 4: SOFTEN THE CUTICLES
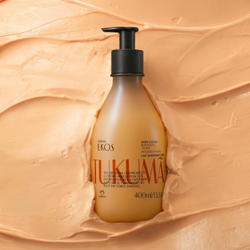
With your hands already exfoliated, apply a hand cream - such as Cacau Hand Cream, Tukumã Hand Cream, or Castanha Hand Cream. Massage each finger. Place a small piece of cotton over the cuticles. Then, spray a little water over each one. Wait for about five minutes. The goal is to soften the skin.
STEP 5: REMOVE CUTICLES
Remove the cotton pieces and, using a cuticle pusher, gently push the cuticle back away from the nail. Then, remove the excess skin with nail pliers. Try to remove the skin completely without pricking. If you feel the need, file further to smooth any irregularities you notice on your nails.
STEP 6: APPLY BASE COAT
Even if you don't want to paint your nails, it is always good to apply a base coat that contains five vitamins to nourish the nails.
STEP 7: NAIL POLISH
It may not seem like an easy task, but you can achieve a satisfactory result by polishing your own nails without haste. Once the color is defined - this part is highly therapeutic -, apply a layer over each nail, check if the tone is uniform, and repeat the application if necessary.
STEP 8: FINISH
Moisten the tip of a toothpick in the nail polish remover and stick a small piece of cotton to it. Dip the tip with cotton back into the product. Then use the tip to gently clean the outline of each nail. Finalize by putting a clear topcoat on. It'll add shine to nails and protect your manicure from chipping.
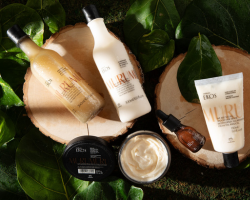
Once nails are dry, massage nails and cuticles with a few drops of Castanha Concentrated Oil, which will help fortify nails and hydrate cuticles.
HOW TO DO PEDICURE AT HOME
The step by step is the same. The difference here is in choosing to exfoliate with a scrub or a foot file. We recommend a gentler option, like scrubs.
If you decide to not paint your toenails, you can take the opportunity to super hydrate after removing the cuticles. To do so, simply apply a generous amount of a moisturizer such as Castanha Foot Cream mixed with Castanha Concentrated Oil and wrap your feet with film paper, reusable bags, or old socks. Leave during the time of an episode of your favorite series. When finished, remove the excess of the cream with a towel.
Sanitize your accessories
Try to never share items like nail pliers, nail clippers, and cuticle pushers, even with people who live in the same house. Regardless of whether the utensils are for personal use only, it is recommended to clean them with 70% alcohol before and after use.


